If you want to run a GNU/Linux environment on Windows, you may utilise WSL 2, which is the most recent version of the compatibility layer. By using WSL 2, a Windows user may immediately utilize Linux tools and utilities on Windows — without having to set up a virtual machine beforehand. Working in cooperation with Linux distros, WSL 2 was designed by Microsoft to improve productivity and experience for Windows 10 users while allowing them to produce Linux distributions.
With WSL 2, users may expect significant improvements in speed and system compatibility over WSL 1. There are a number of new features in WSL 2, the most notable of which are:
- Using a virtual machine that is being monitored and maintained (VM)
- Providing complete access to the system
- It has a Linux kernel built-in.
In the end, it is these qualities that make the transition from WSL 1 to WSL 2 so appealing.
Getting Started
If you’re using an x64 machine, you must have Windows 10 version 1903 (OS Build 18362 or higher) or Version 2004 (OS Build 19041 or higher) installed before you can proceed (for ARM64 systems). Using the search box next to the Start button, type “winver” to see what version of Windows you have.
Using Settings > Updates and security > Check for updates, you can see which versions of Windows 10 need to be updated.
As a last check, make sure that your device has appropriate support for Hyper-V virtualization by running Msinfo32.exe and looking at the system information that comes up on the screen.
Now that we’ve completed that step, we’re ready to begin the installation.
Step 1: Setting up the WSL environment
This is an essential step in the installation of WSL, regardless of the version you choose. Using basic terminal commands, we can get WSL up and running.
Start by typing “Windows PowerShell” into the Start search box. Select Run as administrator from the context menu by right-clicking on the first result. Hopefully, a console has now appeared.
Press enter to execute the following command on the console:
A command like dism.exe can be used to enable the Microsoft-Windows-Subsystem-Linux functionality.
The final result should like the imagebelow
Step 2: Setting Up the VM Platform
WSL 2 has a built-in kernel, unlike WSL 1, which needs a separate kernel. We need a Virtual Machine Platform because of this.
Windows PowerShell commands will be used in a similar manner to those used for WSL in step 1.
For the Windows 10 (2004 edition):
All features of the VirtualMachinePlatform feature are enabled, and dism.exe does not need to be restarted.
Version 1903 and 1909 of Windows 10 are supported.
In order to activate a Windows feature, you must first enable it using the command line. No restart of the virtual machine platform
It’s a good idea to restart your device after completing steps 1 and 2 to ensure that the modifications you made take effect and that everything functions as expected.
Also Read: Windows 11 vs Windows 10: Who wins the battle?
Step 3: Defaulting to WSL 2
When your computer has restarted, launch Windows PowerShell as an administrator and type the following command:
wsl --set-default-version 2
The console may prompt you to upgrade your WSL kernel in some instances. As an example, it should look like this:
There is a link to the update in the image above, or you can download it by going here (for x64).
Run the script again once you’ve finished installing and the default version should now be WSL 2.
Step 4: Install a Linux distribution
After setting up WSL 2, it’s time to set up a Linux distribution. You may pick and choose from a vast range of solutions, each with its own set of advantages and disadvantages. In the Linux community, Ubuntu 20.04 LTS is one of the most popular open-source operating systems. However, there are other solutions such as Kali Linux, Pengwin and Fedora Remix for WSL.
We’ll choose Ubuntu 20.04 LTS as our Linux distribution for the time being, because it’s easy to use and widely available.
Getting started with WSL 2
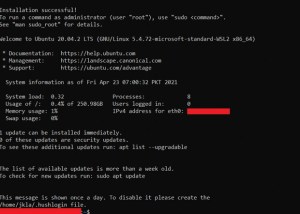
You may access the distro of your choice from the newly added icons in the Start menu after you’ve installed it. To begin the process of installing Ubuntu, click on the Ubuntu symbol. Since this is the first time the computer has started up, it will take some time to download and extract all the necessary files and programmes. Don’t switch off your phone or tablet while this is taking place. It will ask you for a username and password after it has finished starting up. Use the username and password you like. Now that you’ve done that, you’re ready to start using WSL 2.


